Saturday, March 31, 2018

Finishing details

Finished off the barnboard details
 I managed to finish off the stair installation this morning and glue the treads down into place. Except for the bottom one, which I plan to make a storage box with the tread lifting up with a hing....still have to figure that one out. But at least the bulk of the work is done!

I used hard as nails to glue the stairs in place and was thrilled that they came out level in all directions without needing the pack of shims I bought! I'm getting better at this carpentry stuff! (I'm so proud of myself!)

I also buckled down and almost finish trimming out the loft windows. I wanted to do something creative to cover up the seams of the plywood, but it didn't turn out the way I wanted so, I scrapped that idea, took the loss in money and went for the materials I had on hand...the leaf trim that I hand stained. Not only did it work out perfectly covering the mistakes I had made....but it's beautiful and ties everything in!
treads stained and ready to install

laying out the fabric - first 3 yards
 I was also determined to finish covering up all the insulation this weekend, so this time I decided to just go to the fabric store and splurge on fabric that really spoke to me to cover it up. Now that I know how easy it is to just tuck in....well, that was something I knew I could easily finish up.

I love LOVE the look of aqua/turqoise with deep rich wood colors...so since I didn't get the exact color I wanted for behind the mandala in the salon, I got a more vibrant one for the loft. Plus it will tie in perfectly with the bedspread I found in the fall last year! Again...things coming together so nicely...they always seem to when you follow your heart...follow your true dreams of your true self!

cutting it up...tedious, but oh so satisfying!


before
After!
It felt really good to see so much done...sometimes its the little details we overlook, and don't realize how much those little details really contribute to the vision coming together. I added little 1/4 round trim along the corners of the loft as well and only have a few more things and I'm pretty much done! Hard to believe how close I'm getting to finishing it all up! I can so taste it....but love savoring what is currently in my mouth...it's watering just being here!


Friday, March 30, 2018

Each step is coming together!

it took me most of today to get everything put together properly...but DAMN....I'm proud of it! Because I did this RIGHT this time...I redesigned the depth of the stairs to be only 12" for the first four steps so the landing (also my main closet) could be larger (closer to 20"). It makes way more sense for my closet and I LOVE how it turned out. This decision also worked out perfectly for buying pine treads at Home Depot for very little money and cutting them in half to exactly what I needed. The top tread also worked out perfectly as I just needed to cut off the rounded end and notch one side and glued them together to have a nice platform!
basic stair skeleton put together.
the closet will be the two steps farthest right...nice opening

Love how my new idea turned out for boxing it all in!

 
Success and satisfaction....that's one happy hippie girl!


Earlier (in the first pic) I had tried to use up the 1/4 plywood to sheath the stairs...but i hated how it looked on the side, no classy way to finish it off. So, I ripped it off and brainstormed. Instead I realized to add both strength and tie in the rest of the look of the living area I would just use the barnboard! It was a brilliant idea and solved a ton of problems...had to add a few boards in certain places because I hadn't planned ahead, but it wasn't too difficult to unscrew the structure to add the extra boards. And it was SO worth any little bit of extra effort!

I absolutely love how it all came together, is totally solid and beautiful. I'm so thrilled right now!

Wednesday, March 28, 2018

Huge involvement...moving on up

I managed to lay out and stain the stairs and feel so much better about them this time around.
Amazing how having a second chance to do something that failed the first time can result in such an improved result! I'm sure the third, fourth, and fifth times would be even better...but at some point you have to say....this is "good enough"....there is no "perfect" and be happy and satisfied.

I'm hoping that's how I feel after the stairs are done!

laying things out to visualize my idea in 3d

staining the boards for the finished look

installing the major supporting points

things coming out pretty square and level!
I had a tough night, tired and distracted, reminding myself to enjoy the journey and not rush...kept cutting the boards wrong and forgetting what stage I was on...confusing myself unnecessarily. Realizing how much this parallels my life right now. How much thought I put into things...how "hugely involved" I am in things.

It's a good thing though, to be "hugely involved", I'm grateful that that is in my personality, because I don't want to be one of those people always envious of what other people are doing, the lives they are living...I want to always be "hugely involved" in my own life and each decision I make so that the vision I have of my life will come true. Involvement is so important...involvement is EVERYTHING!

I highly recommend to go out and be HUGELY INVOLVED in your own life too! It may not be convenient, or easy or even seem worth it sometimes....but I SWEAR to you from personal experience of currently living it.... It's amazing!!!

Just look at what kind of things you can accomplish in as little as 7 months! :-)

Sunday, March 25, 2018

No limits Ceiling .... Done

It's an amazing feeling to see the ceiling put together after dreaming about it for so long.


Saturday, March 24, 2018

My mandala manifested

I have had this vision of my floating home ceiling for so long...
I really can hardly believe that the time has finally come...and like most long awaited things...it was  easier than I had anticipated!

I had dreamed about the steps I would take to accomplish this...,but along the way I started to burn out and feel like I should just do the easy thing....just get it done and move on. I had a nice talk with my friend Dawn this week after my trip to Italy telling her of the book I mentioned in yesterday’s  blog post. I told her I was thinking of taking the easy road on my ceiling and she flat out said NO! “You will do the harder thing because it will be better!” She reminded me. Oh how I love good friends! And she was right...she does know me. I thought about my dream and couldn’t compromise...I’m done compromising...I’m following my vision fully! And I’m soooooo glad I did!


It was a multi-step process starting with hand dying the duck canvas I bought to be the color I wanted. (A teal jade green aqua ish color) then I had to cut strips to fit between the beams so I could keep them exposed. I love the look of exposed beams.


 I actually totally enjoyed staying home from a mediocre ski weekend to do this “mundane” task. Nothing about it felt mundane....I was following my dream...and sometimes the destails of a dream seems mundane if you have the wrong attitude...but my Day way anything but mundane...it was magical!!! I listened to music and felt the scissors cutting the fabric...excited for once to follow a straight line. Each snip of the scissors brought me one step closer to seeing the ceiling done! And that means another dream manifested!
measuring and making my marks

cutting, cutting, cutting into my dream


After cutting the strips, I tested the outer beams to understand the installation process. It wasn’t entirely clear in my mind the best way to do it. So I did the first step I was sure about...staple it in on one side. When I was done it dawned on me I could just tuck it in like making a bed! It was brilliant! Now I have access to the space without undoing hardware just in case I end up needing to hide wires for overhead lighting there in the future! Perfect! I installed another section then started prepping the rest of the strips for the mandala stencil.


first...staple one side to the beam

then tuck it in for a beautiful tight look!
The prep involved another enjoyable task of folding all the sides in two inches (using a ruler and straight pins) to make sure the mandala was in the middle of the material. The sun was shining though the glass doors and the river view was breathtaking I was so happy there in that space doing exactly that! Damn I feel so fortunate!
pinning the sides in

After the prep work I was pretty jazzed to get the stenciling going. I could totally see me finishing this tonight and installing it tomorrow. And so, I taped the stencil on and did the first round...applying the Gesso to the canvas so the acrylic will not bleed through or stick to the floor. I have a feeling in this case I would have been fine without it, but felt I’d do what was recommended by the art teacher at UNH when I wandered in with my daughter a few weeks ago. I hadn’t even known the art store existed on camps, so when she called us in and told me about Gesso, I figured the universe gave me some good advice I’d better take!
everything lined up and pinned ready for stenciling.

After the Gesso went on I decided I liked the look of the white so much in the background color that we was going to stay simple with my original idea of white with hints of aqua.
round one: apply the Gesso

So the first layer was just rolling on a thick base of white, then using a sponge I dabbed on areas of aqua and refilled white on top to lessen the intensity (I’m intense enough for this project 😉).
final round: solid white with hints of aqua in random locations
....because I'm so random!

I love the results and am super stoked to see the dries results in the morning and install it all!
It's gonna look amazing...Check back tomorrow and see for yourself! 🙏😁


Friday, March 23, 2018

Notches in my belt

It's hard to believe how fast time can seem to pass when looking back. I've been traveling for work and now that I'm back (and not jet lagged) it's time to get back into building mode again. During my travels I finished a book I love called "the rock warriors handbook". You don't even have to be s Rick clone to get some amazingly precious nuggets from its message. And upon finishing the book on my flight home I was reminded once again to..... ENJOY THE JOURNEY!

It was good timing for that message because I found myself feeling overwhelmed at the thought of trying to finish my home by May. First, I created a deadline for myself which was first inspired by the possibility of being on the home and garden TV show that had approached me in the fall. They didn't think I'd be done by April when the next season would air. I pushed to prove I could... And in the process got burnt out. So now that I'm back from my trip...I took all deadlines of the table and am already feeling more energized and light.

Next, I realized much of my overwhelm was coming from trying to hard to look at the finished product. There is SO MUCH work left to do.... Especially on the raft side which I still haven't redesigned. But the book reminded me if I'm not enjoying the simple steps of each movement, feeling the joy for being able to do this.... Then I'm doing it for the wrong reasons. Doing this to be done just to said "i did It", just to build a list of accomplishment to move on to the next item on the list is WRONG. And I know those aren't my reasons. I chose this for me, for my vision of my life, And that in itself is my joy in this process.

So I pulled back that vision and focused only on a single track today. First with some finishing touches in the loft. Earlier in the week I attempted to do the windows but everything felt difficult and it took me to long to do s simple task. So I stepped away, revalidated and was able to easily accomplish it today (while enjoying each step).
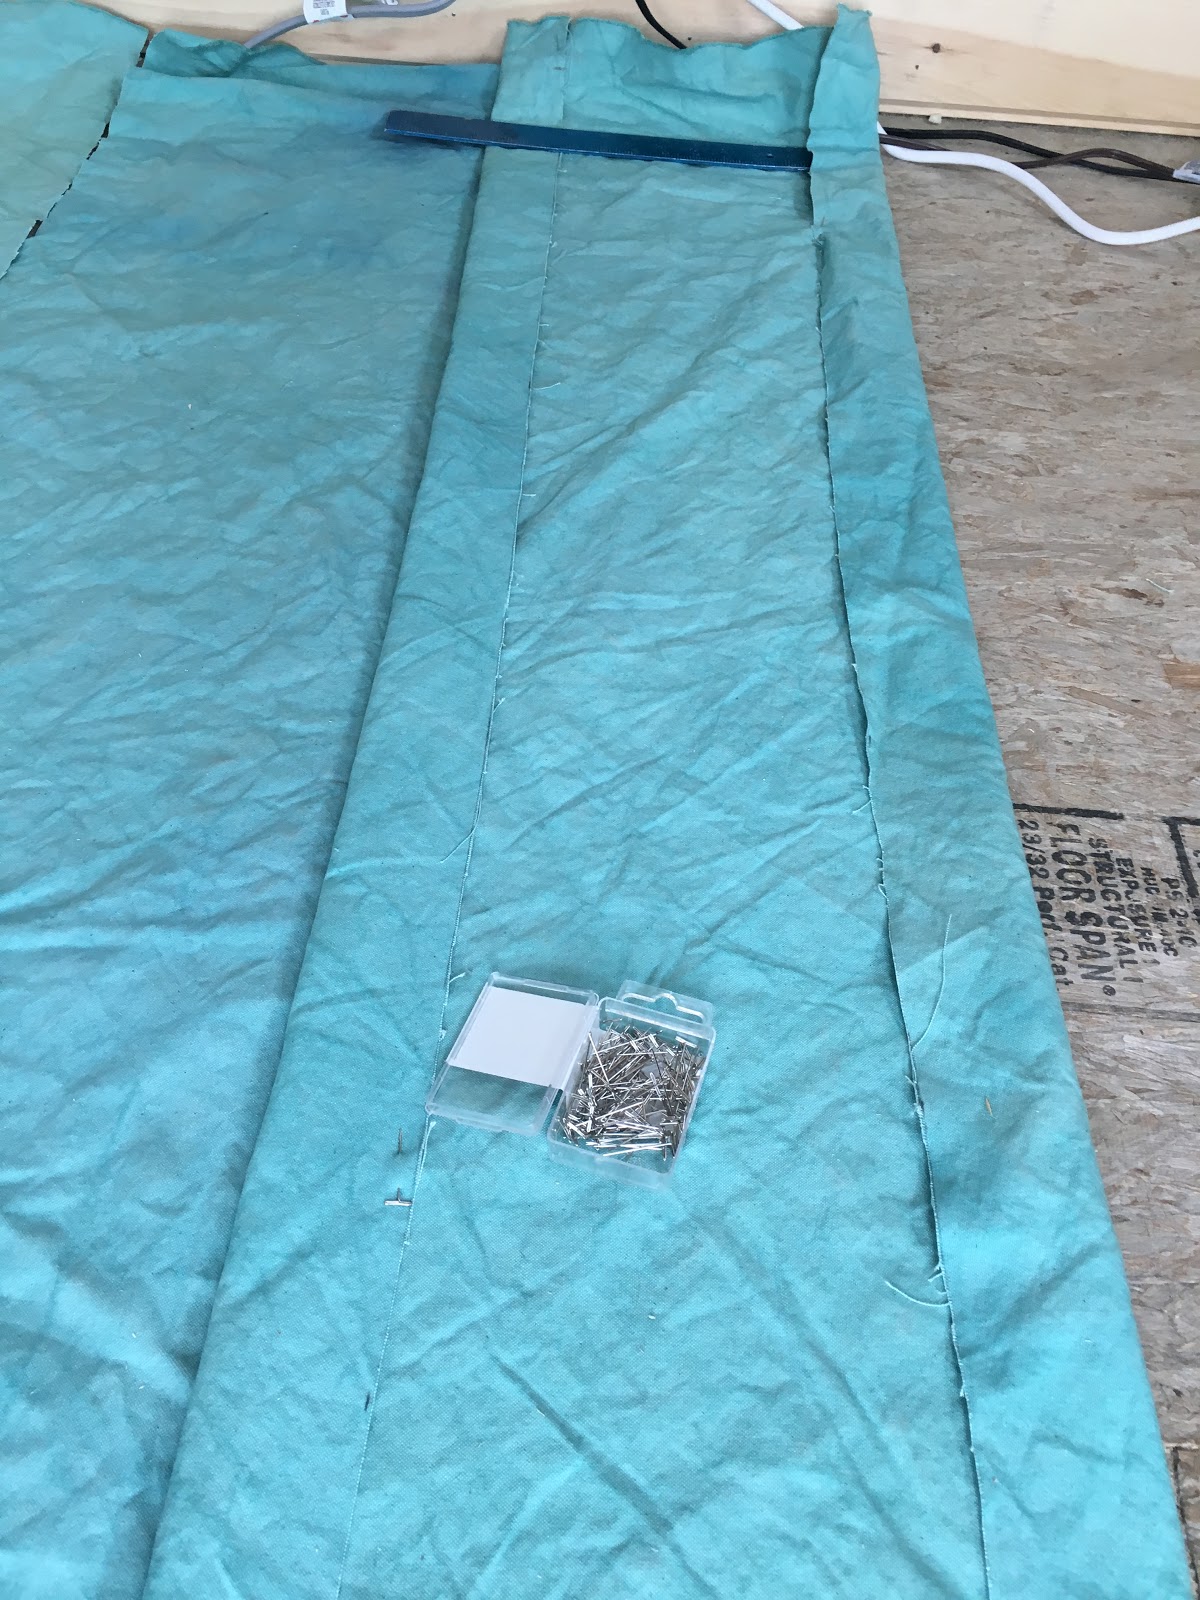
nailing in the prestained cuts...finding out my measurements weren't so great..nothing new!
Next I wanted to finish up some of the trim work... Only I realized after the fact that I had used the wrong boards in the wrong place... Luckily it was an easy fix, I had the right supplies! I also needed to cover up the silicones hosts that we leaking before the silicon... Now it's looking much cleaner and I'm confident it won't leak again! 
hiding the sticky seams

used the board in the wrong place...luckily I had more and they were the same size!
I was definitely feeling like I needed to do the tasks I was somewhat avoiding since I was in a better frame of mind and so I worked to finish the remaining walls with whatever materials I had left. 
That included a cut I am super proud of....A single piece that not only had to work around the shape of the octagon window, but also had to lock in the upper and lower sections of the tongue and groove! It ended up being a very satisfying challenge! 


before

after! I'm so proud of this!

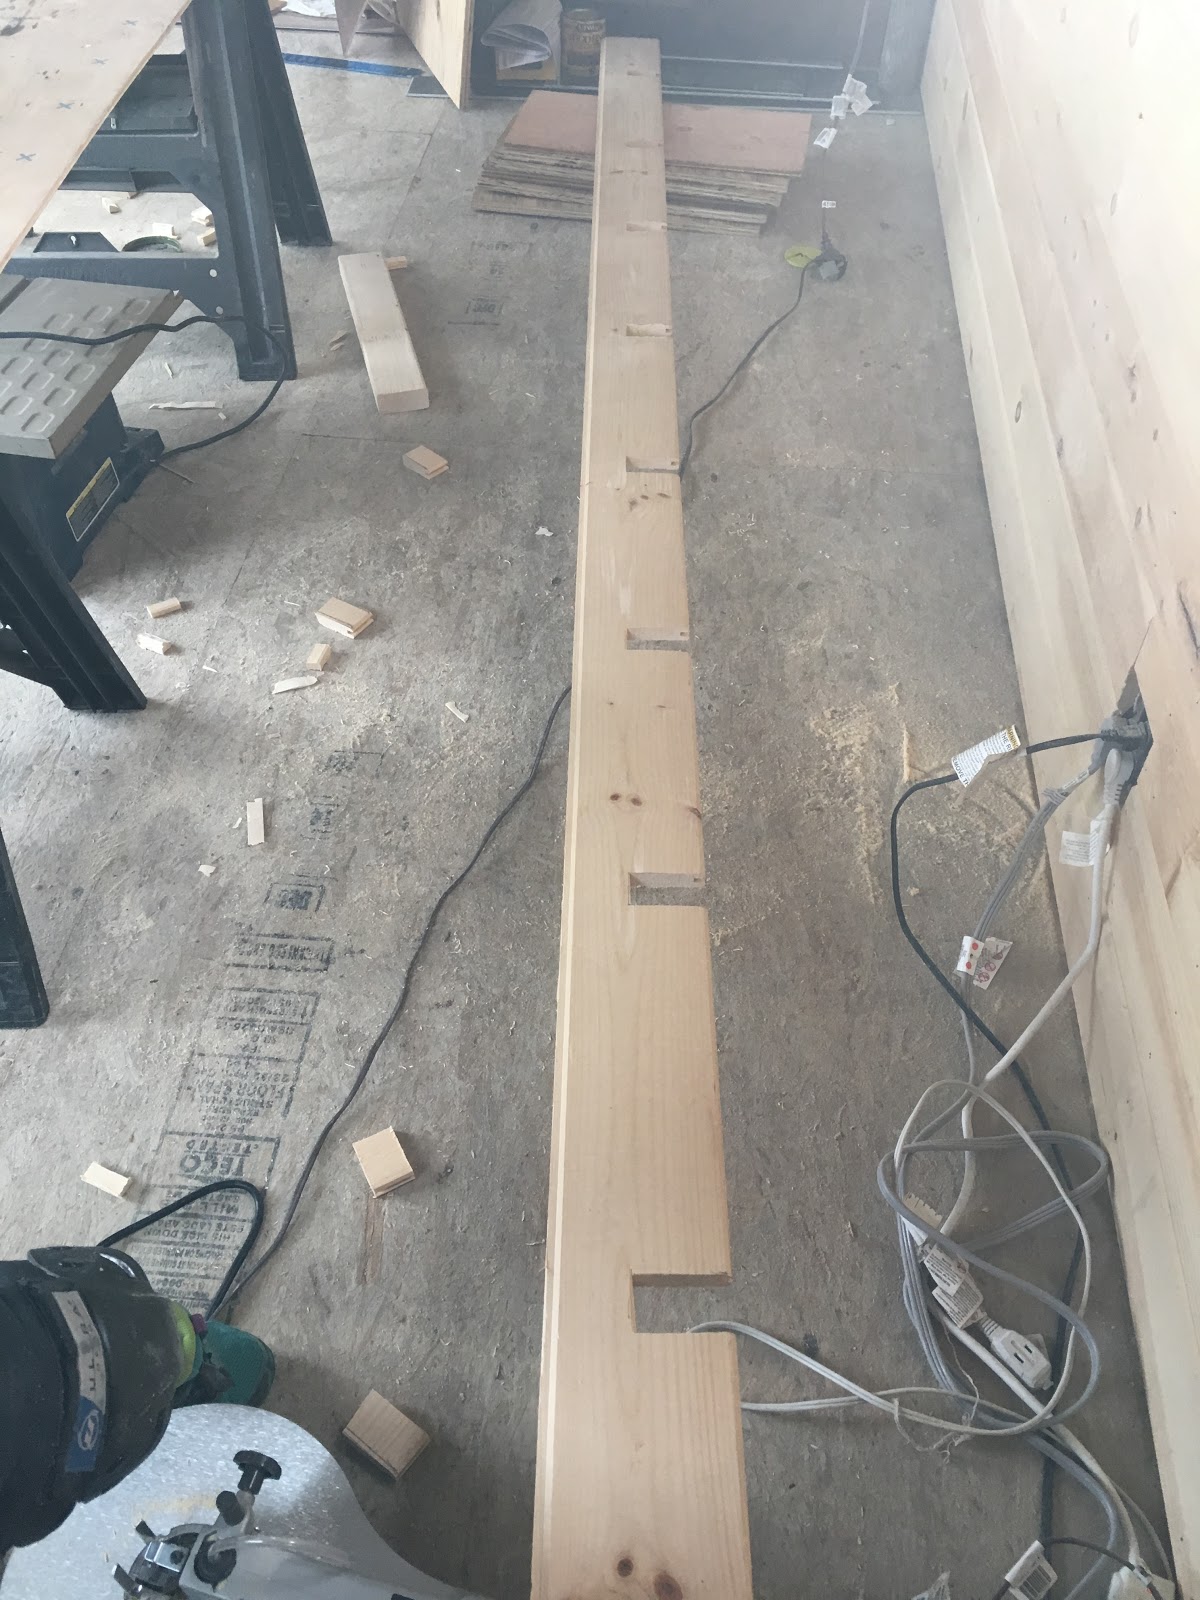
I had two full sized tongue and groove pieces left...and I immediately knew what I was supposed to do with them, even though I resisted it at first. I needed to use them to finish up each wall at the top. My resistance was that I had to decide to either rip them to fit just below the roof joist beams and then figure out what to do with the portion above that line or notch them out to give it a more finished professional look, help to hide all my carpentry mistakes and be done in one shot. After some deliberation, i realized I could totally do the notching I had avoided numerous times during this build. Now was the time to face my fears!

Part of my apprehension was the fact that I learned the hard way about how being off even a 1/16 of an inch can add up over a run and drastically change your measurements down the line if not corrected for immediately. Then I realized....it IS a lesson i LEARNED! I won't make the same mistakes because I am totally aware of the consequences now....So, armed with my new awareness I slowly took my time and used my new skills to measure out and create the notches.

I have to say too, I thoroughly enjoyed that part of the journey (armed as well with my new attitude). I had an opportunity before me to be a proficient notcher-outer! So, I measured three times and cut iteratively, allowing myself space to breath and correct for errors. And only slight mishaps (including breaking a few scroll saw blades and cracking some wood) that just add character to my story....I FUCKING DID IT! And my second super proud moment of the day ensued!

measuring  three times
ideally cutting once!

before installing notched board

after the notches....wow it looks so good!


just starting to get dark, but the last one is done!

To celebrate I spent some time cleaning everything up...my goal tomorrow is to have some fun painting the mandala on the canvas for the ceiling. No clue how exactly I'm going to do that....but that will just be another step I will thoroughly enjoy tomorrow!
looking aft
looking forward...to tomorrow! :-)

Friday, March 2, 2018

First floor is in!

I decided to go the most practical route and then try to pick the best colour with what was on hand at home depot. This is called LifeProof laminate.... It's 100% water proof, scratch resistant and a lifetime earthy with no maintenance! No nailing, no glue, and it comes with underlayment already attached. It also can be installed on subfloor and works great with inconsistently leveled surfaces....PERFECT ... Because that would about sun up what I need!


I'm so proud of my cuts around Ursula! 

Lessons learned....In moments if frustration trying to figure out a good consistent system for installation....Take five minutes out to be grateful you get to do this project and feel your whole body in gratitude....And it doesn't hurt to call in all the help you can get... All the air, the wood, the materials, Michael the angel, Zeus, God, Jesus, Santa, goodness, lucky stars, and maybe... Just maybe.... You'll suddenly understand it and finish with no further issues! I mean it just might happen.... I did for me!


Side note: I witnessed first hand the full moon high tide during the rain storm.... Wow intimidating.... I'll be happy when my barrels are back on and secured


!

Insurance at last!

I haven't given up. I just needed to walk away and take a break. So, I am walking 2,000+ miles from Georgia to Maine on the appalachian ...