Showing posts with label loft. Show all posts

Tuesday, June 12, 2018

room to breathe

with the roof officially waterproofed I can now feel secure in stretching out in the loft with no worries!

What a beautiful feeling!


Evidently, I am not entirely done with the roof. I thought I had left overs that I might be able to return for it felt I had WAAAAYYYYY too much paint...however, Ian informed me that I need to use ALL the paint sent to me....I still have 2 FULL 5 gallon buckets left! One grey and one white! HOLY SHIT!!!


At this rate it will take me another few weeks to get this done....considering I'll be out of town the next couple of weekends (to find that work-life balance...even work balance on this project needs some downtime so my cramping hands can recover!) looks like I won't be done with it until early July!

TAKE A DEEP BREATH AND CARRY ON!

That's all I can do....must maintain my vision, can't stop now. 

Friday, March 23, 2018

Notches in my belt

It's hard to believe how fast time can seem to pass when looking back. I've been traveling for work and now that I'm back (and not jet lagged) it's time to get back into building mode again. During my travels I finished a book I love called "the rock warriors handbook". You don't even have to be s Rick clone to get some amazingly precious nuggets from its message. And upon finishing the book on my flight home I was reminded once again to..... ENJOY THE JOURNEY!

It was good timing for that message because I found myself feeling overwhelmed at the thought of trying to finish my home by May. First, I created a deadline for myself which was first inspired by the possibility of being on the home and garden TV show that had approached me in the fall. They didn't think I'd be done by April when the next season would air. I pushed to prove I could... And in the process got burnt out. So now that I'm back from my trip...I took all deadlines of the table and am already feeling more energized and light.

Next, I realized much of my overwhelm was coming from trying to hard to look at the finished product. There is SO MUCH work left to do.... Especially on the raft side which I still haven't redesigned. But the book reminded me if I'm not enjoying the simple steps of each movement, feeling the joy for being able to do this.... Then I'm doing it for the wrong reasons. Doing this to be done just to said "i did It", just to build a list of accomplishment to move on to the next item on the list is WRONG. And I know those aren't my reasons. I chose this for me, for my vision of my life, And that in itself is my joy in this process.

So I pulled back that vision and focused only on a single track today. First with some finishing touches in the loft. Earlier in the week I attempted to do the windows but everything felt difficult and it took me to long to do s simple task. So I stepped away, revalidated and was able to easily accomplish it today (while enjoying each step).
nailing in the prestained cuts...finding out my measurements weren't so great..nothing new!
Next I wanted to finish up some of the trim work... Only I realized after the fact that I had used the wrong boards in the wrong place... Luckily it was an easy fix, I had the right supplies! I also needed to cover up the silicones hosts that we leaking before the silicon... Now it's looking much cleaner and I'm confident it won't leak again! 
hiding the sticky seams

used the board in the wrong place...luckily I had more and they were the same size!
I was definitely feeling like I needed to do the tasks I was somewhat avoiding since I was in a better frame of mind and so I worked to finish the remaining walls with whatever materials I had left. 
That included a cut I am super proud of....A single piece that not only had to work around the shape of the octagon window, but also had to lock in the upper and lower sections of the tongue and groove! It ended up being a very satisfying challenge! 


before

after! I'm so proud of this!

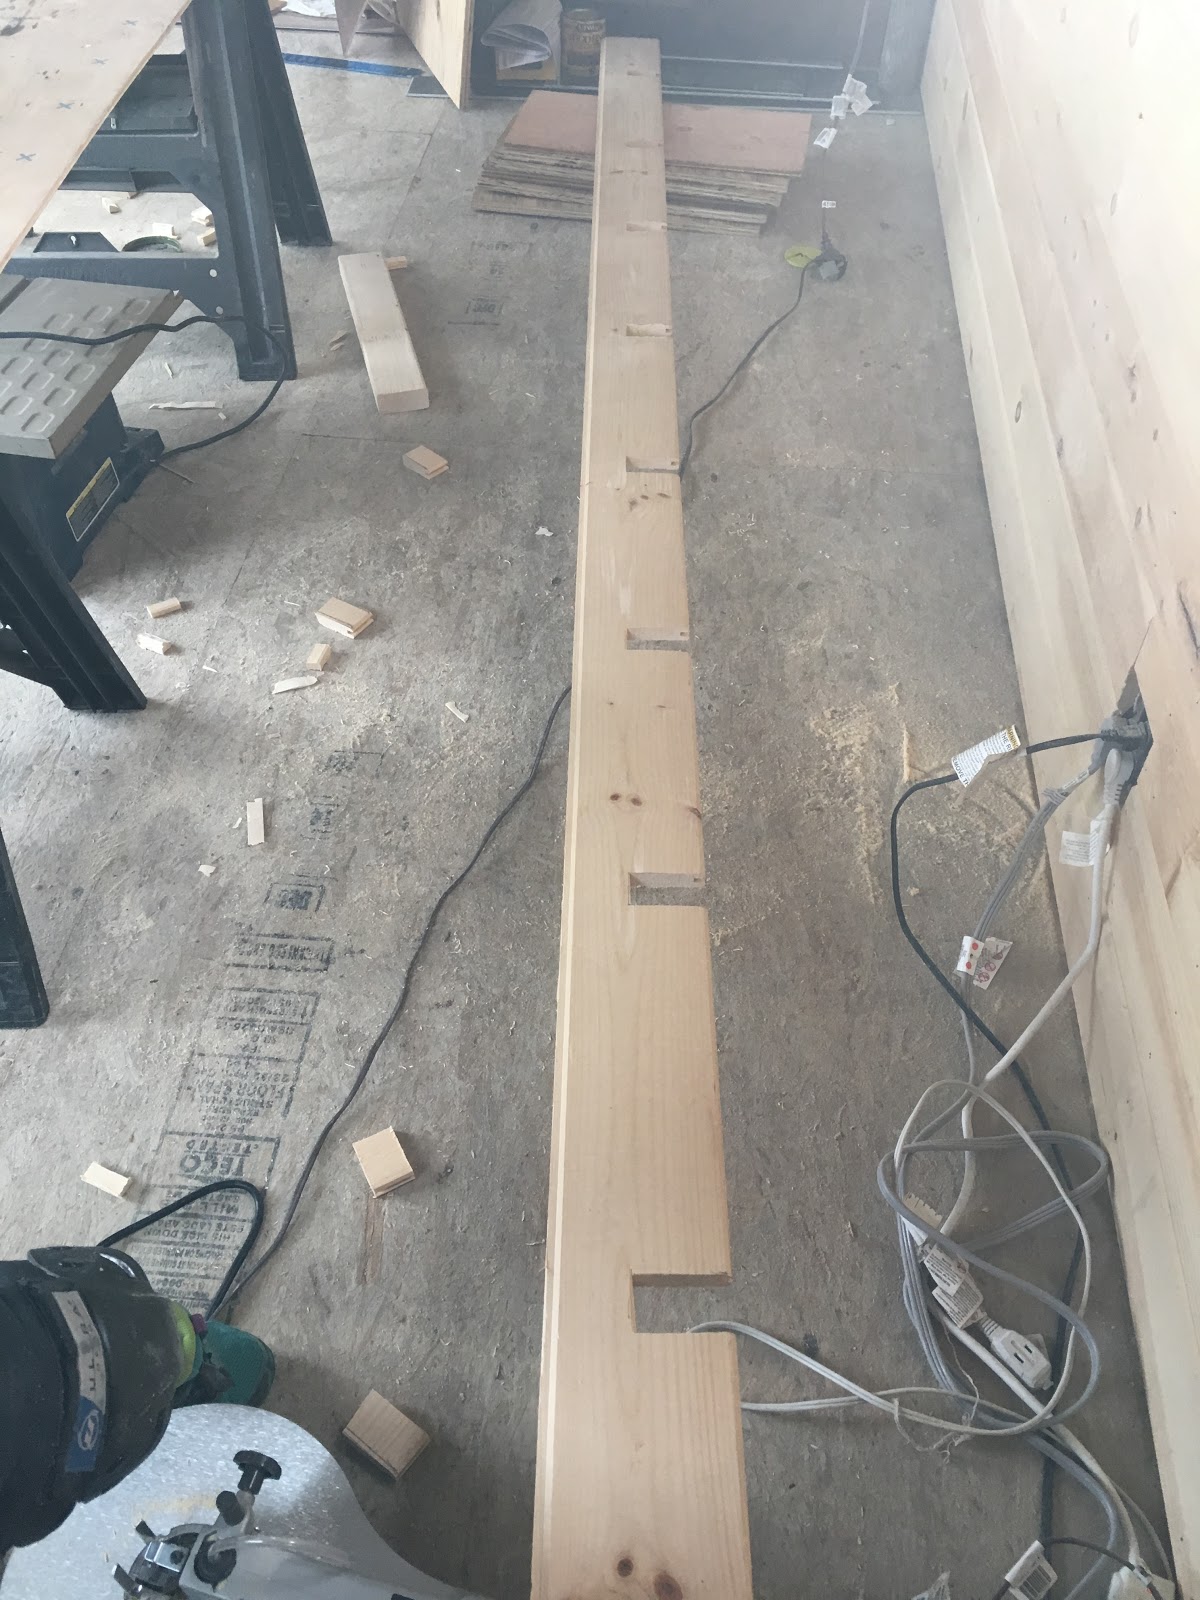
I had two full sized tongue and groove pieces left...and I immediately knew what I was supposed to do with them, even though I resisted it at first. I needed to use them to finish up each wall at the top. My resistance was that I had to decide to either rip them to fit just below the roof joist beams and then figure out what to do with the portion above that line or notch them out to give it a more finished professional look, help to hide all my carpentry mistakes and be done in one shot. After some deliberation, i realized I could totally do the notching I had avoided numerous times during this build. Now was the time to face my fears!

Part of my apprehension was the fact that I learned the hard way about how being off even a 1/16 of an inch can add up over a run and drastically change your measurements down the line if not corrected for immediately. Then I realized....it IS a lesson i LEARNED! I won't make the same mistakes because I am totally aware of the consequences now....So, armed with my new awareness I slowly took my time and used my new skills to measure out and create the notches.

I have to say too, I thoroughly enjoyed that part of the journey (armed as well with my new attitude). I had an opportunity before me to be a proficient notcher-outer! So, I measured three times and cut iteratively, allowing myself space to breath and correct for errors. And only slight mishaps (including breaking a few scroll saw blades and cracking some wood) that just add character to my story....I FUCKING DID IT! And my second super proud moment of the day ensued!

measuring  three times
ideally cutting once!

before installing notched board

after the notches....wow it looks so good!


just starting to get dark, but the last one is done!

To celebrate I spent some time cleaning everything up...my goal tomorrow is to have some fun painting the mandala on the canvas for the ceiling. No clue how exactly I'm going to do that....but that will just be another step I will thoroughly enjoy tomorrow!
looking aft
looking forward...to tomorrow! :-)

Sunday, January 14, 2018

Loft is in...windows are in!

I was so excited by my hardware discovery yesterday coupled with the extremely warm weather (60F/15.5C) we are having I knew I needed to take advantage and just push hard. So, I stayed up all night to get the loft installed and lined up some help installing the last few windows today.

First I had to figure out how to install my hardware in the tree....at first my head thought i needed to carve out a big hole....but that was my old design....this new one was even better as all I had to do was carve out a U. It took me some patience and various tools (chisel, regular large drill bit then finally a paddle bit) but I happily worked on it through the night until I was able to drive it all the way in.
Named the tree Ursula in honor
of my U-shaped hardware

A sweet moment pounding her in and she finally fit!

After installing the hardware Ursula was ready to go! I bolted her into the floor and readjusted my loft frame to utilize her as a support. My only problem was that I was lacking one more two-by-four to complete the end of the frame.....and I had put so much time into it by this point I really wanted to see it finished. Home Depot was closed and I searched my basement without any luck. I resolved to hitting HD in the AM first thing to get a board so I could have it all assembled before my friend showed up. Then, low and behold, there in the dark as I shown my light on the ladder to climb up and close up shop for the night I found her! A lone piece of 2x4 beneath my raft waiting, begging for me to use her tonight!
Me in utter disbelief that I got the exact length
of 2x4 I needed when I really needed it!
 See my manifestation powers really are getting honed! ;-)

I was so excited I got a second wind and went all the way! I stained the plywood so it would look acceptable as the loft floor (i even stained the underside of it since it will be exposed down below).

I stained all the joists that would be exposed to keep the feel in the place consistent with the roof beams, then I assembled her and laid the plywood on top to be fastened down later.

sanding away the print
staining the loft joists
staining the loft floor


still staining, and cutting
pretty proud of my calculations for fitting
Ursula into the loft floor!

OMG! I actually have a loft now!

I FUCKING LOVE IT!
It came together so nicely! I am beyond thrilled right now! Now my friend and I will have a platform to install the loft windows, making our work that much easier!

old hardware above, new below.

 In the AM (after a few hours of sleep) I got things
cleaned up and organized and fixed the
hardware on the kitchen window.

leaking like my weeping eyes...nothing that can't be fixed!
Another great thing about the thaw is I could see there was one wall that had some leaking issues. Luckily I was able to see this and correct it before it would be too hard to spot. I hadn't caulked or sealed the other octagon window so I did that as well as when on the roof and sealed the hell out of the loft roof edge on that wall. About 20 nails and a thick bead of silicon and I'm pretty confident most of the leaking is fixed. The rest seemed to be an oversaturation of the T1-11 which will be taken care of once I paint the outside with the elastomeric paint.


Finally it was time to install the window...and I have to say, because of the forethought and more experience that I had with the previous ones....these went surprisingly fast! Fast enough to get it all done by noon to have lunch with my girlfriends!

Dave installing port side loft windows
Finishing off the starboard loft window!
 so grateful for the help!
thanks Dave!

Saturday, January 13, 2018

I found it...and I believe!

I last wrote about my custom solution and ...well, that whole law of attraction thing is really starting to make sense to me now! I went into Amesbury Industrial to get proper hardware for my octagon window in the kitchen and yeah, they had what I needed (unlike Home Depot). Then, I'm explaining to the guy my tree and the loft and how I want to support it on one side and my idea for how to get it all working, and my problem for not finding.....

And low and behold....as I'm making a square with my hands to explain what I am thinking of for hardware, I look through the hole and see it!

even better than my design!
I had that design (see previous blog entry for comparison in a new window) in my head for weeks and I swear I manifested it! Granted, it wasn't quick and easy....that's just because I'm learning to hone my new manifesting skills....but it probably didn't hurt that once I got serious about it and wrote it down then asked a friend at work and started to search in earnest for it...the universe then took my dreams seriously! Don't believe me? Try it for yourself and let me know!

Now, on to build that loft! ;-)
i'm so "stoked" !!!!!

Wednesday, January 10, 2018

custom solution...

I'm trying to figure out how to install the tree I have that will support one corner of my loft. I came up with this idea and sketched it out in OnShape
After talking with a friend at work I was recommended to have it fabricated at Custom Welding in East Nottingham (right off of Route 4) or similar. He also mentions to "have them cut a disk say 8 inches in diameter and a quarter inch +/- thick and weld a stub one inch in diameter and six inches long in the center." he also reminded me that "drilling out the base of the tree is not trivial as any offset and the tree will stand crooked."

I might need to go a less aesthetically pleasing route just to not fuck up the way I want the tree to stand...and I so love my tree, I really don't want to mess her up!

In the meantime...I need to identify what kind of tree this is! If you have any clue....let me know!

upclose on her bark.

that's her...right in the middle leaning slightly left


Saturday, January 6, 2018

Blank it

 the blanketing continued today and I began to see the blank canvas of creativity before me. Suddenly.bones were filled in with fat and muscle and tissue is soon to follow. It's been five month of building the bones of my little home....And now, in my gestation of my dream, it is transforming into something warmer, something with form and heart.


mostly done with giving the loft its blanket!

I poured my heart into what I call stainting....Painting with stain. I loved every second I spent pouring and dripping and wiping and swirling and dabbing and rubbing. What started off as the cheapest piece of 1/4 plywood I could find...Transformed into a priceless one of a kind expression of me.


first layer....a natural teak.

second layer....americana

final touch....jacobean to match the beams.

In this home, I will always.aim to spend time over money and care over speed. As I finished up and looked around at what was before me I realized the magnitude of what it is I have done so far. I have touched every single board, almost every nail, and screw. I have been here every step of the way, and have a story for each of those steps. This house already has so many memories ....And I smile at each and every one.

This process has been a metaphor for life...
Especially my life as of late.
You have a dream and feel the pull so strongly that something in you forces you to act.
You do, 
and sometimes things flow and feel effortless and easy, 
and then sometimes you find yourself overwhelmed and ready to give up.

But you know you can't....

You've invested too much time, you don't want to admit defeat, you don't want to believe them when they say you can't do it or you shouldn't do it (or even that you are doing it wrong).

So even when you are lost and frustrated and can't find the time or energy to continue...
 you just do. 

You take a break and regroup and let it all sink in and eventually you find something small that feels possible that keeps you in motion. And just because of that...That willingness to keep going, suddenly things fall into place again and before you know it that fire is back and you are in the flow and you realized you've learned and can do more than you could when you started...Knowing more than you did, able to do more. Your skills are slowly increasing as well as your confidence.

Then 
you just know....

You just know you can't stop, you won't stop. And each phase of the cycle is a new blank slate. Time for renewed enthusiasm, updated outlook, and new creative solutions and ideas. It's a beautiful thing even if at times it's maddening....

And this little floating home has taught me that there is magic in madness. ;-)

Thursday, January 4, 2018

tree post

Today the big storm rolled in and blanketed the city in a white fluffy powder that magically transforms melancholy into smiles. The light airiness of the snow has a power to lift your spirits if you let it. And I let it.

I wanted to bring nature into my home and connect with her in a different way. One way I've dreamt of doing that is by having a tree in my house...like a tree house. Sounded magical, so today I went out to make it happen!

Friends with property let me scout out the perfect candidate for my plans and after trekking around on my skis for a little bit and comparing a few, I found one! She reached fairly straight and had a girth that would suit my needs.
There's my tree!

she's tall and lean, but strong and stable

I cut with intention and respect...

....in awe of her story.

hauling her out on my skis

she fits so nicely in my car!

She fits so nicely in my home!

Wednesday, January 3, 2018

Lofty plans

My night time dreams lately have been filled with completing specific tasks on the floating home so I will be ready for launch on time.

The next low hanging fruit was the loft ...and my dreams were telling me how to proceed! (Nice to have that guiding me right now!)

A quick chat with a friend confirmed my next moves so I went for it ...Jackson lumber was great about getting a delivery to me this afternoon and so I was able to get some of it going.

I Installed two ledger boards and a partial wall to support the loft. After holding up the 1/4 plywood to see what it would look like full size, I decided I wanted to keep it as open inside as possible so I’m going to cut it down to fit the 6 foot high loft. That wall will separate the bathroom from the living room couch while also allowing a nice spot for throwing cushions and settling in with a good book overlooking the river!

To support the open corner of the loft I will go out at some point this week and find a tree about six inches in diameter to use as a post. My goal is to have it ten feet tall to reach the top and get the feel of nature indoors! (If it’s not too heavy, otherwise I’ll cut it down to six feet for support under the loft floor)

After the loft install, I’ll be in a better position to figure out where the lighting and outlets will go.

I’ll also be building some storage cubes that will double as stairs to get to the loft. Exciting to see the inside shaping up!


Insurance at last!

I haven't given up. I just needed to walk away and take a break. So, I am walking 2,000+ miles from Georgia to Maine on the appalachian ...